
As part of my ongoing journey in network administration, I’ve been working extensively with pfSense in a virtual lab environment. The experience has been incredibly rewarding, giving me hands-on exposure to managing networks and honing my firewall and security skills. In this post, I’ll walk through the steps I’ve taken to configure my virtual lab, including VLAN setup, firewall rules, virtual machine integration, network routing, and creating useful network aliases.
VLAN Setup and Management
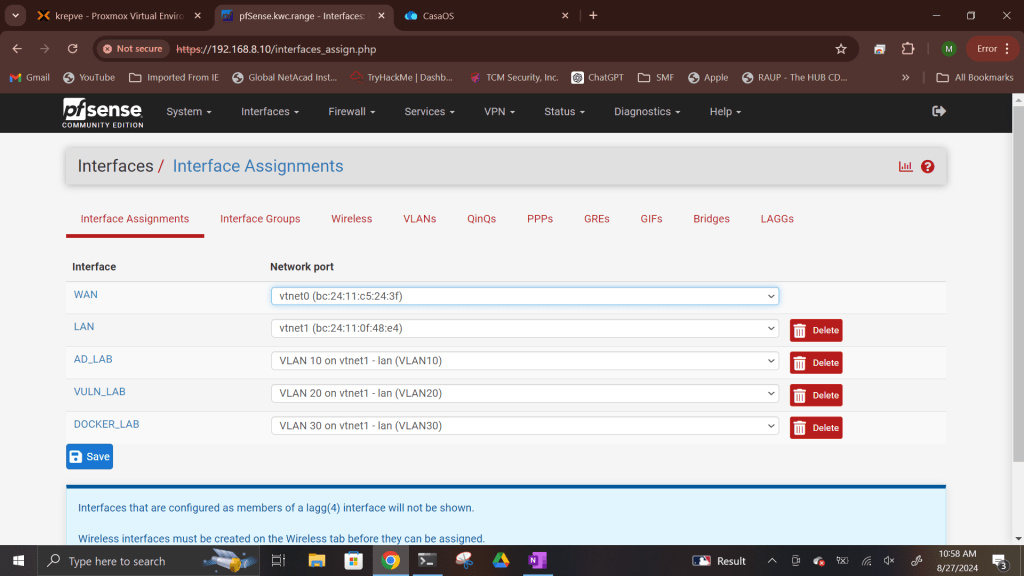
The first step in building my virtual lab network was configuring multiple VLANs (Virtual Local Area Networks) and their interfaces in pfSense. VLANs are crucial for isolating different types of traffic within the same physical network, adding an extra layer of control and security. Here’s what I configured:
VLAN Interfaces: I set up several VLANs, each representing a different segment of my network, including segments for security testing, administration, and general internet use.
Firewall Rules: I created specific firewall rules to control the traffic allowed in and out of each VLAN. These rules ensure that only authorized traffic can pass through each segment, protecting the network’s integrity.
Web GUI Access: I configured firewall rules that allowed secure access to the pfSense web interface from the WAN (Wide Area Network). This allows me to manage pfSense from my external network securely.
LAN Access: I enabled access to the internal LAN of pfSense from my home network, ensuring I could manage everything locally when needed.
Integrating Virtual Machines
Next, I integrated Kali Linux into the lab as a virtual machine running on the LAN. This allowed me to verify that DHCP (Dynamic Host Configuration Protocol) was functioning correctly and to have more control over the lab environment. To ensure consistent connectivity and management, I assigned Kali Linux a static IP address.
For added flexibility, I set up both SSH (Secure Shell) and RDP (Remote Desktop Protocol) on the Kali machine, allowing me to access it remotely from the WAN.
Creating Network Aliases
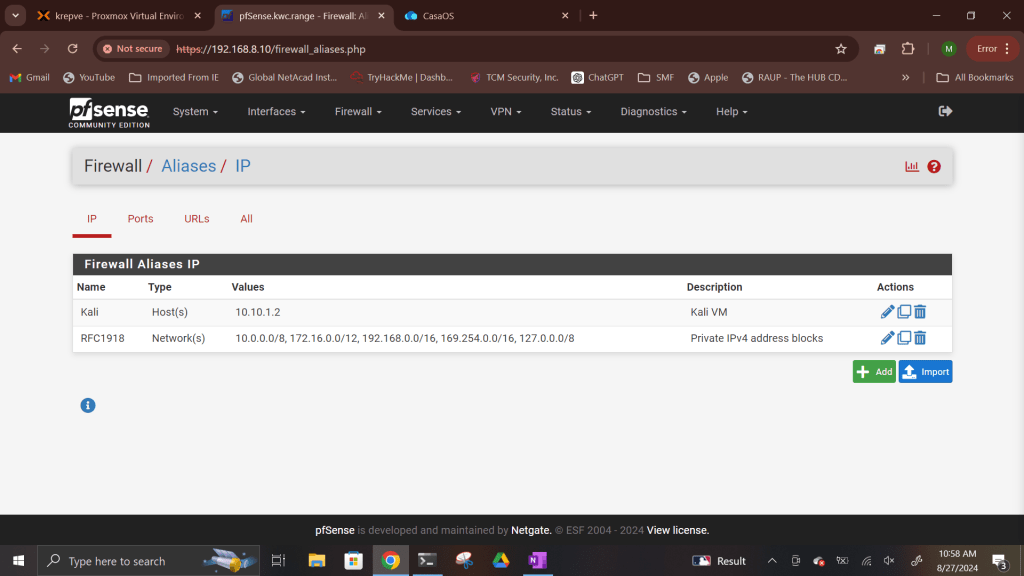
To simplify the management of firewall rules, I created network aliases for commonly used elements:
Kali Linux: An alias to easily reference the Kali VM in firewall rules.
RFC 1918 Addresses: These internal, non-public IP ranges were aliased to manage traffic flow between private networks.
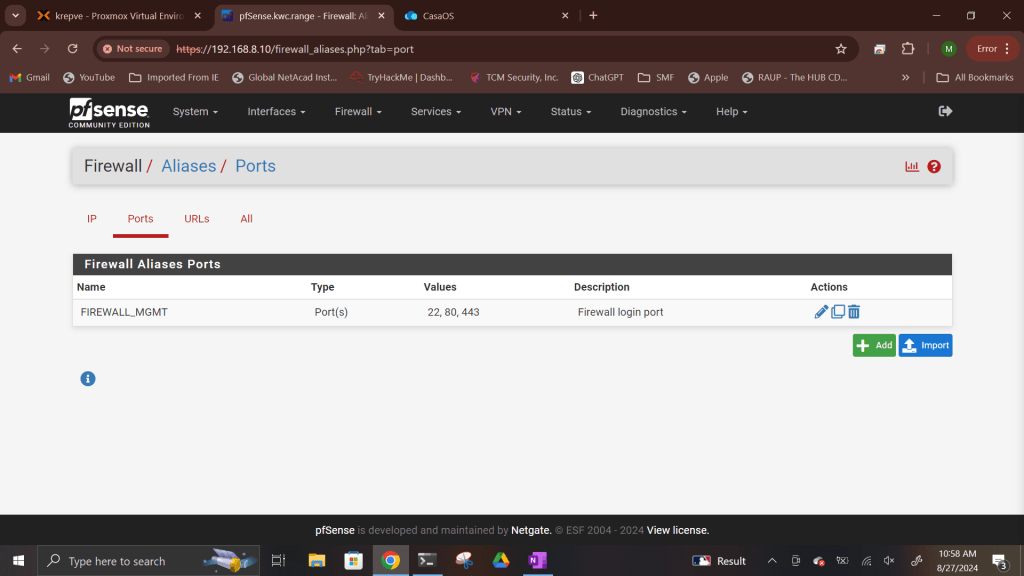
Firewall Ports: I set up aliases for important firewall ports (22 for SSH, 80 for HTTP, and 443 for HTTPS), streamlining the process of creating rules for services that rely on these ports.
These aliases save time when creating or modifying firewall rules and add clarity to the overall configuration.
Configuring Firewall Rules for VLANs
One of the most critical tasks in managing a network is configuring firewall rules that control traffic flow between different segments. Here’s what I did:
Rules for Each VLAN: I established custom firewall rules for each VLAN, ensuring that traffic could only flow in the ways I intended. For example, some VLANs were restricted to internal use, while others had full internet access.
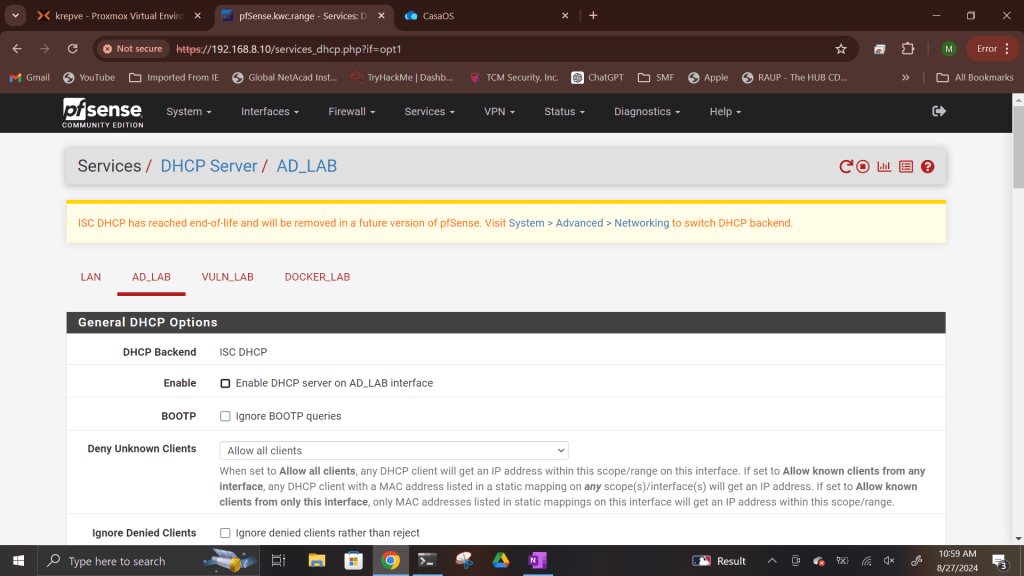
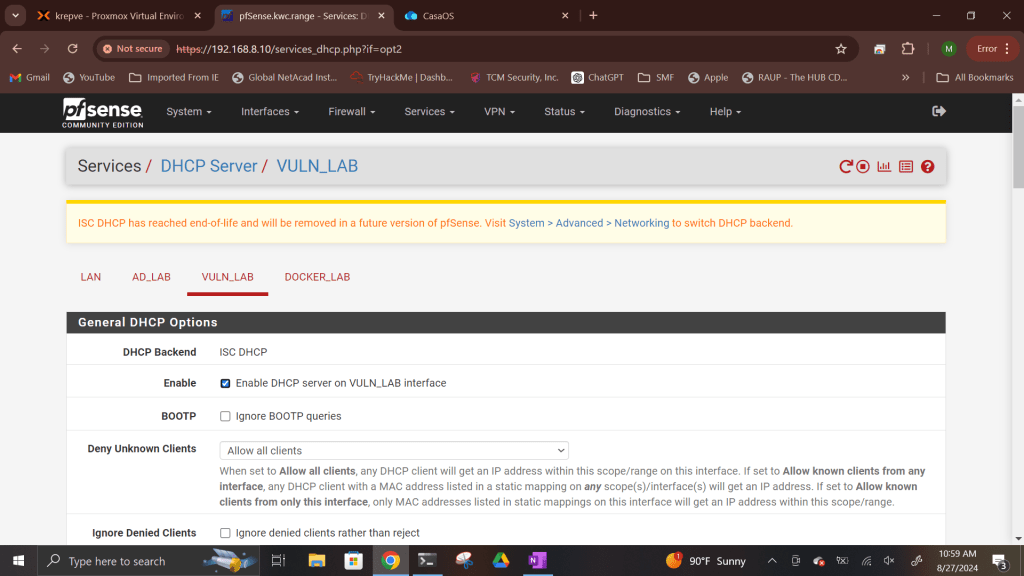
Enable DHCP Server on Interfaces: In order for any virtual machines to be added to the network and receive an IP address, there has to be a DHCP server on each vlan. I enabled and setup DHCP on each vlan interface and set DHCP scopes except for one. That vlan interface will have DHCP taken care of by another operating system: Windows Server 2022.

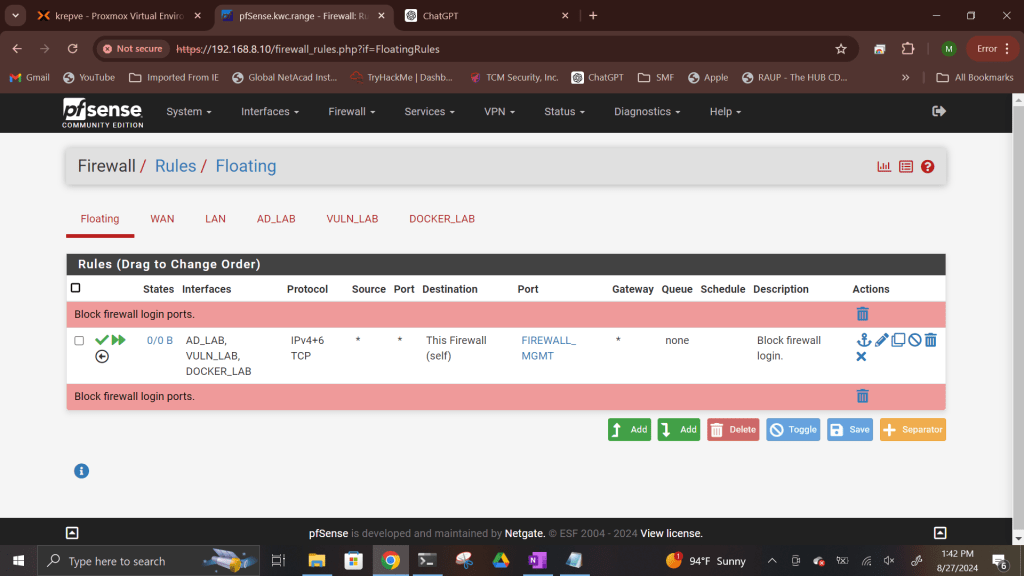
Floating Rules: To prevent unauthorized access to the firewall’s management port, I set up floating rules that blocked access from all VLANs. This extra measure adds another layer of security, ensuring that even if someone gains access to a VLAN, they won’t be able to tamper with pfSense itself.
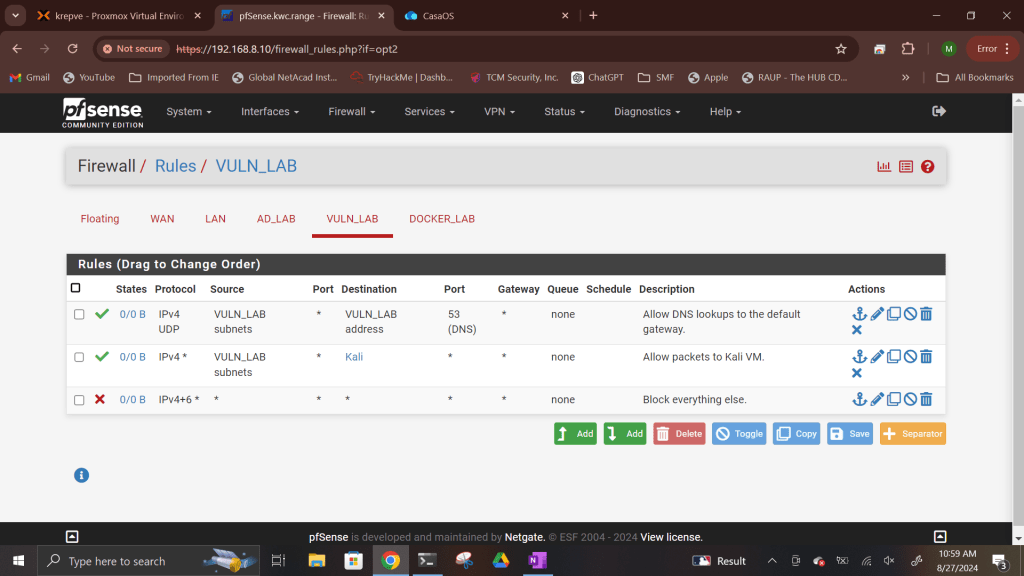
DNS-Only VLAN: I created a VLAN that was restricted to DNS lookups only, preventing any external internet access. This is useful for scenarios where you need internal name resolution without providing full internet connectivity. I will use this vlan to host vulnerable machines to learn more about ethical hacking and practice penetration testing tools.
Internet-Access VLANs: Other VLANs were configured with full internet access, but tightly controlled through specific firewall rules. One vlan will be used as an Active directory vlan, while the other will be used as a Docker vlan.
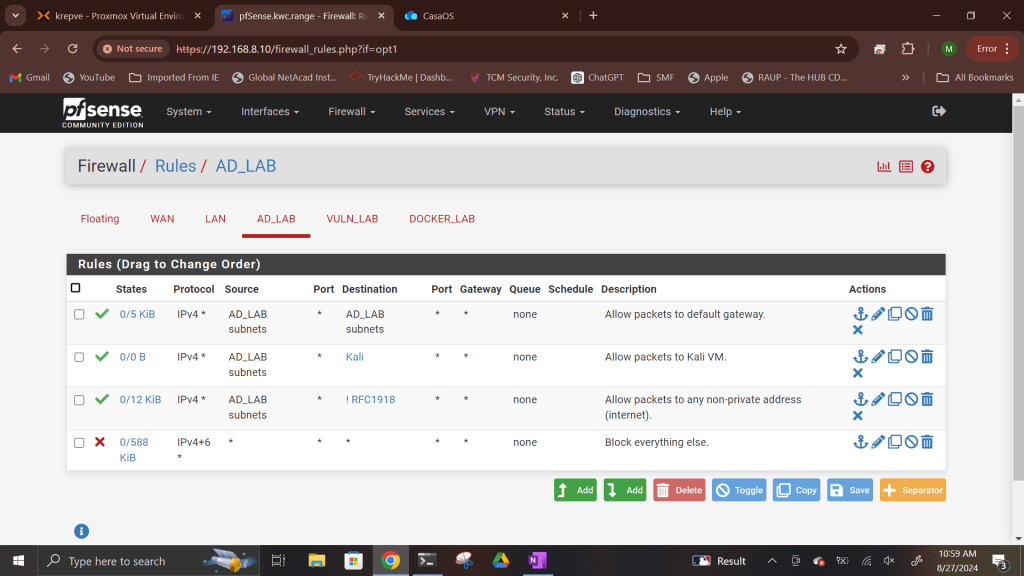

Traffic Flow to Kali Linux: Finally, I ensured that traffic from the different VLANs could pass through to the Kali virtual machine, allowing me to run security tests from various network segments.
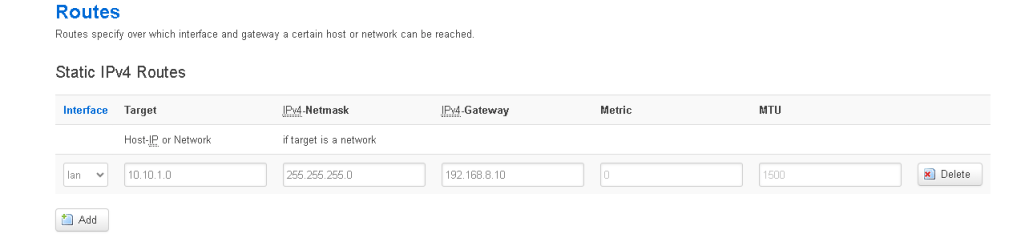
Setting Up a Static Route from Home Router
One of the more complex steps in my setup was configuring a static route from my home router to the pfSense LAN. This allows seamless connectivity between my home network and the virtual lab, letting me manage and test the virtual lab environment from my home LAN without any interruptions.
This static route helps bridge the gap between my real-world home network and my virtual environment, creating a versatile lab setup where I can simulate real-world network scenarios and test various security measures.
Lessons Learned
This hands-on experience with pfSense has been invaluable in enhancing my skills in network administration. I’ve gained a deeper understanding of how to manage traffic across VLANs, secure the firewall, and configure a virtual machine within a network. I’m looking forward to tackling even more complex scenarios, such as integrating more advanced monitoring tools and further hardening my lab’s security.
If you’re looking to start your own journey into network administration or simply want to learn more about pfSense, I highly recommend setting up a virtual lab. It’s a great way to build your skills in a safe and controlled environment.
Next Steps
My next focus will be adding more layers of complexity to my lab environment, such as setting up Active Directory, intrusion detection systems, implementing VPNs, setting up docker, and testing network monitoring and security tools. Stay tuned for more updates as I continue to develop my lab and document the journey.
If you have any questions or suggestions, feel free to reach out or leave a comment below!
Conclusion
Working with pfSense has been a great way to deepen my understanding of network security and administration. As I continue to experiment with my virtual lab, I’ll be sharing more insights and experiences here on my blog. Stay connected for more updates!

Leave a comment