
As part of my ongoing journey to build a robust homelab, I recently set up pfSense as a virtual machine within Proxmox. This setup marks an important step in creating a secure and isolated network environment for my virtual machines. In this post, I’ll walk you through my process so far and share what I’ve learned along the way.
Why pfSense in Proxmox?
For those unfamiliar, pfSense is an open-source firewall and router platform that provides a wide range of networking features. It’s highly customizable, making it an excellent choice for both home and enterprise environments. Proxmox, on the other hand, is a powerful open-source virtualization platform that allows you to run virtual machines (VMs) and containers.
By setting up pfSense as a VM in Proxmox, I can use it as a virtual firewall to create and manage an isolated network environment. This setup not only helps in keeping my virtual machines secure but also allows me to experiment with different network configurations in a controlled environment.
Step 1: Installing pfSense as a VM
The first step in this project was to install pfSense as a virtual machine in Proxmox. The installation process was straightforward:
- Create a new VM: I started by creating a new VM in Proxmox, allocating resources such as CPU, RAM, and storage as per my needs.
- Install pfSense: I then mounted the pfSense iso and followed the installation prompts to get pfSense up and running as a VM.
Step 2: Configuring WAN and LAN Interfaces
Once pfSense was installed, the next step was to configure the WAN and LAN interfaces. Here’s how I approached it:
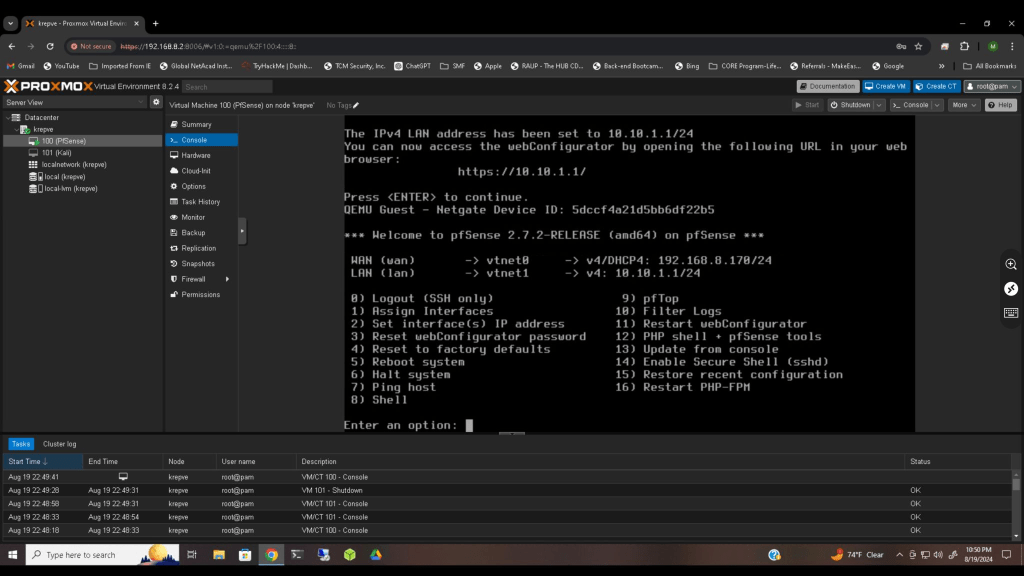
WAN Interface: The WAN interface is connected to my home network, allowing pfSense to receive an IP address from my router. This interface handles the external traffic to and from my virtual network.
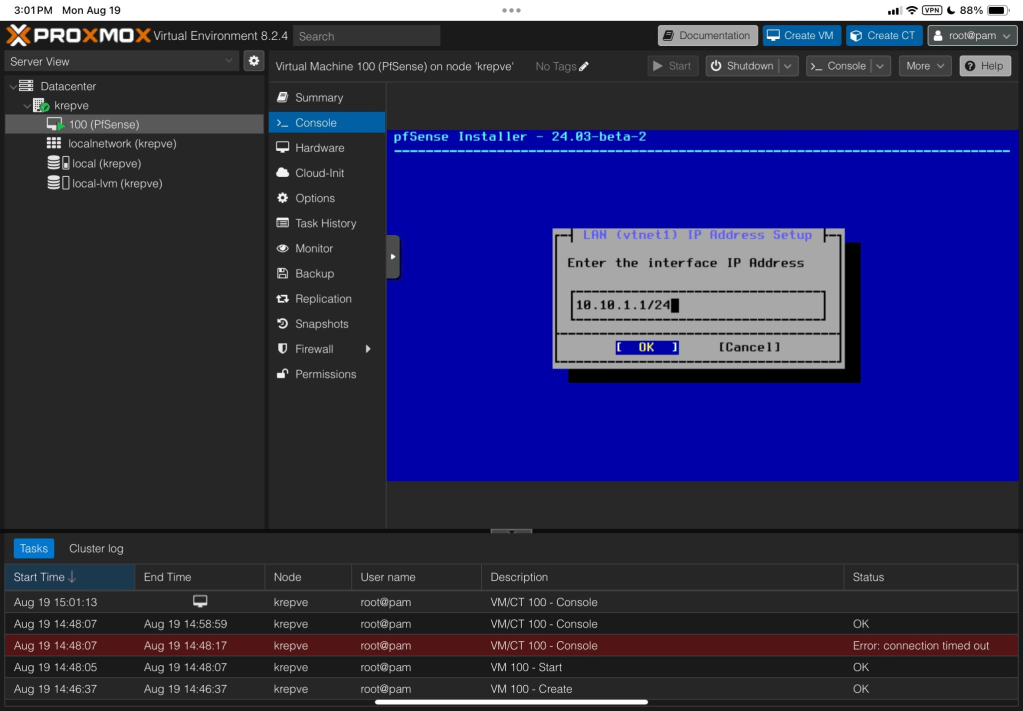
LAN Interface: The LAN interface, on the other hand, is configured to manage the internal network for my VMs. I assigned a static IP address to this interface to serve as the gateway for my isolated network.
Step 3: Setting Up DHCP
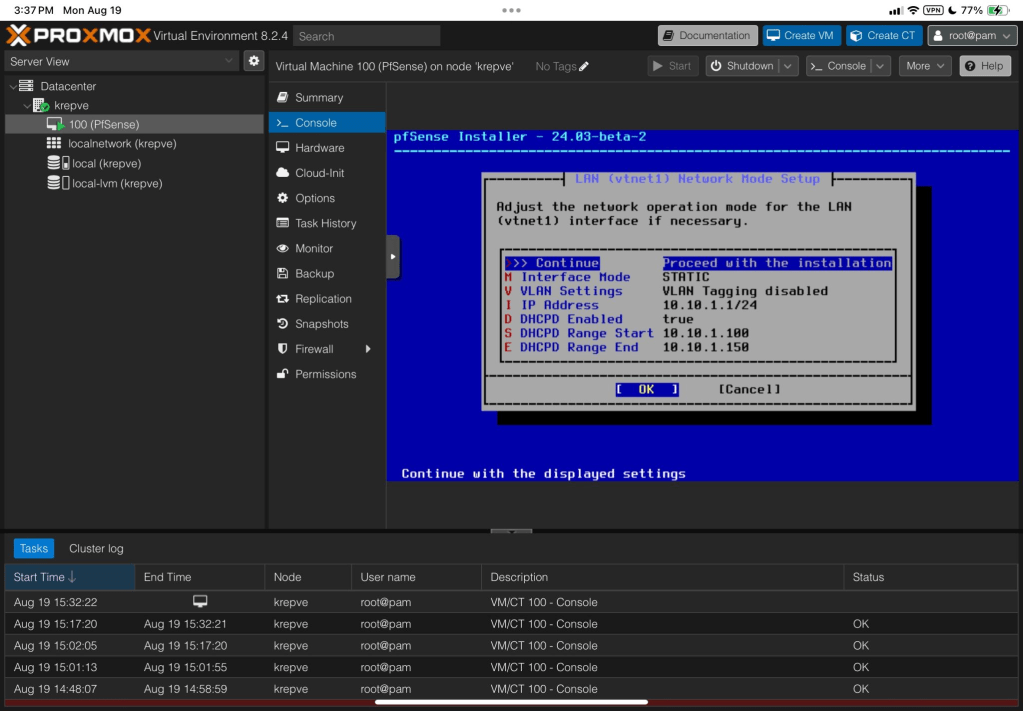
With the interfaces configured, I moved on to setting up DHCP for the LAN interface. This allows pfSense to automatically assign IP addresses to devices on the internal network, simplifying network management. I set the DHCP range to ensure that all devices within my network would receive unique IP addresses within the designated range.
What’s Next?
The setup so far has provided me with a solid foundation for my virtual network. Moving forward, I plan to dive deeper into pfSense by exploring VLANs and other advanced configurations. This will allow me to further segment my network, improve security, and gain more hands-on experience with network administration.
Conclusion
Setting up pfSense as a virtual machine in Proxmox has been an incredibly rewarding experience. It’s given me a deeper understanding of networking and virtualization, and it’s only the beginning of what I plan to accomplish with my homelab.
Stay tuned for more updates as I continue to build out this environment and document my learnings. If you’re interested in networking, cybersecurity, or homelabs, I encourage you to explore pfSense and Proxmox—they’re powerful tools that offer endless possibilities for experimentation and learning.

Leave a comment